By Tom Jow
In the March issue, I explained the importance of preventative mainenance on the suspension and how servicing components in a timely manner saves not only money, but time on the bike as well. This month, I show how to maintain a much less expensive, however no less significant component, the bottom bracket.
The bottom bracket is the central rotating component of the crankset, those long arms that the pedals attach to. Located at the lowest point of the bicycle frame, the bottom bracket is subject to the exposure of water and dirt from both inside and out. In addition, the bottom bracket must also operate with a minimum of friction while enduring the high forces of power production through the crankset.
Bottom bracket condition can be easily assesed by removing the chain from the chainrings, and then performing the following: grasp one crankarm and wiggle it laterally to determine if there is any side to side play, and then rotating the crankset gently to find any excess friction. Bearings that are no longer adquately lubricated may spin easily but will have a dry, rough feel to them.
There are many types of bottom brackets in use on bicycles today, but for this article we will learn to replace the two most popular original equipment units: Shimano and FSA/Truvativ.
Tools required:
Shimano:
5mm hex wrench
Thin blade screwdriver
TL FC-16-18 crank cap remover
Bottom bracket wrench
Torque wrench (recommended)
All purpose bicycle grease
FSA/Truvativ:
8mm hex wrench (long handle preferred)
Bottom bracket wrench
Torque wrench (recommended)
All purpose bicycle grease
Step 1. Wash the bike and drivetrain
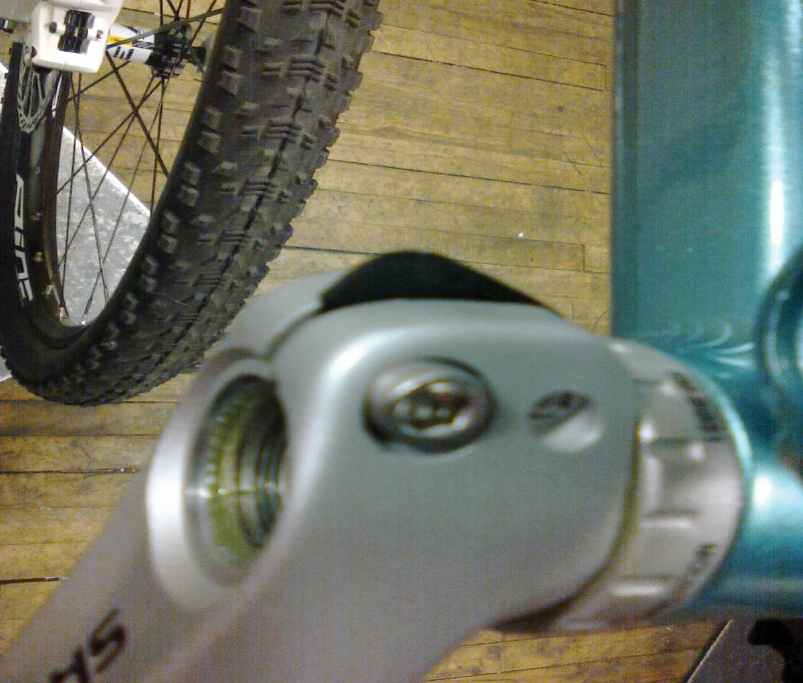
Step 2. Start by removing the left crank arm. For Shimano, use the 5mm hex wrench and loosen the crank arm pinch bolts. Next remove the crank arm fixing bolt using the cap removal tool, FC-16/18. Next, insert the blade of a thin screwdriver, into the relief slot of the crank and pry up the safety washer. (Photo 1) Finally, grasp the crank arm in the center and wiggle and pull at the same time. The arm should come off with little trouble.
(Photo 1) Safety washer up, arm ready for removal.
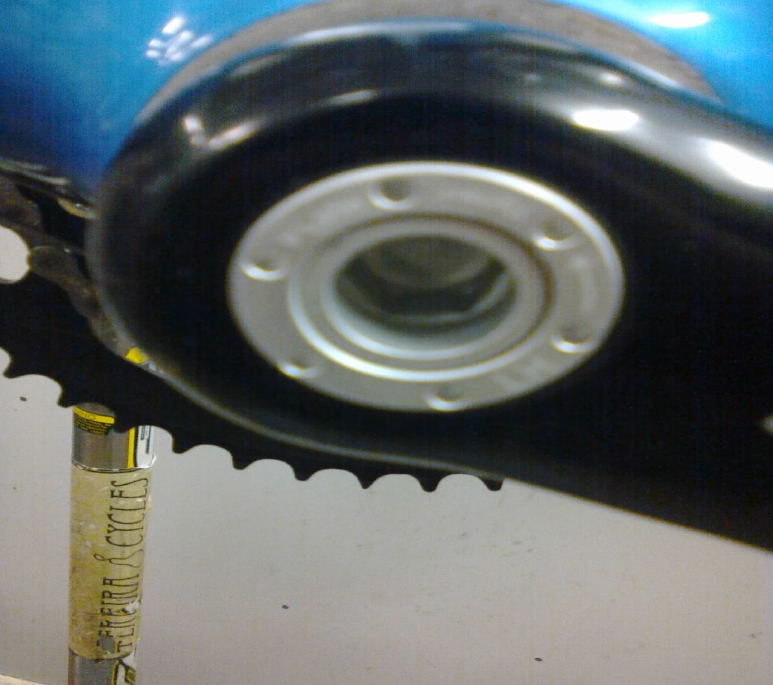
To remove the FSA /Truvativ left crank arm, insert the 8mm hex wrench into the left crank arm fixing bolt. (photo2). Turn the wrench counter-clockwise to remove the bolt. The bolt will break loose, and then you will encounter pressure again. Continue loosening the bolt. At this point, the bolt will press the crank arm off the spindle. This is called a “one key release”.
(photo 2) FSA/Truvativ one key release
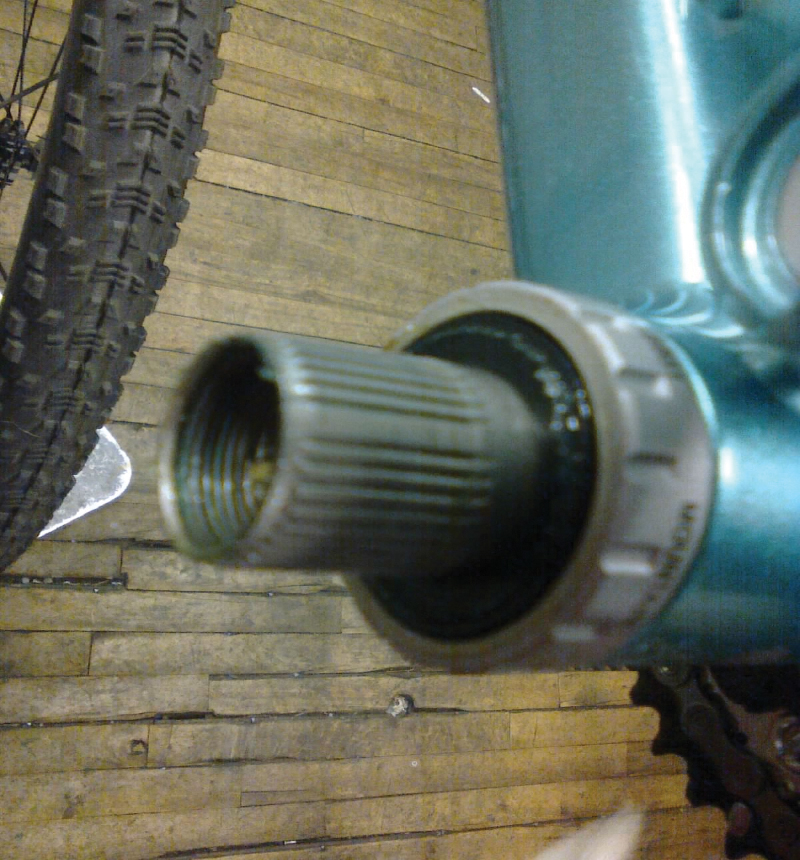
Step 3. When the spindle end is exposed, (Photo 3.) place a folded rag over the end and hit it a couple times with the heel of your palm.
(photo 3) Place a folded rag over this and hit it with your hand.
It should slide out pretty easily. When the spindle end is completely inside the botttom bracket. Disengage the chain and let it hang over the bottom bracket until step 4. Continue removing the crank by grasping the chain ring spider and gently wiggling the spindle free from the bottom bracket
Step 4. Remove the bicycle from the stand and place it upright on the floor (you are using a stand, aren’t you?). Beginning with the left side, lean over the bike from the right side and place the bottom bracket wrench on the bearing cup in such a way that will allow maximum downward leverage when pressing down in a counter-clockwise direction. Push hard. Once the bottom bracket is loose, it should spin easily by hand. Use a rag for extra traction if necessary. Repeat on the right side, however, the right side uses a left-hand thread and is removed by twisting in a clockwise direction.
Step 5. With a rag, clean out the bottom bracket shell and threads.
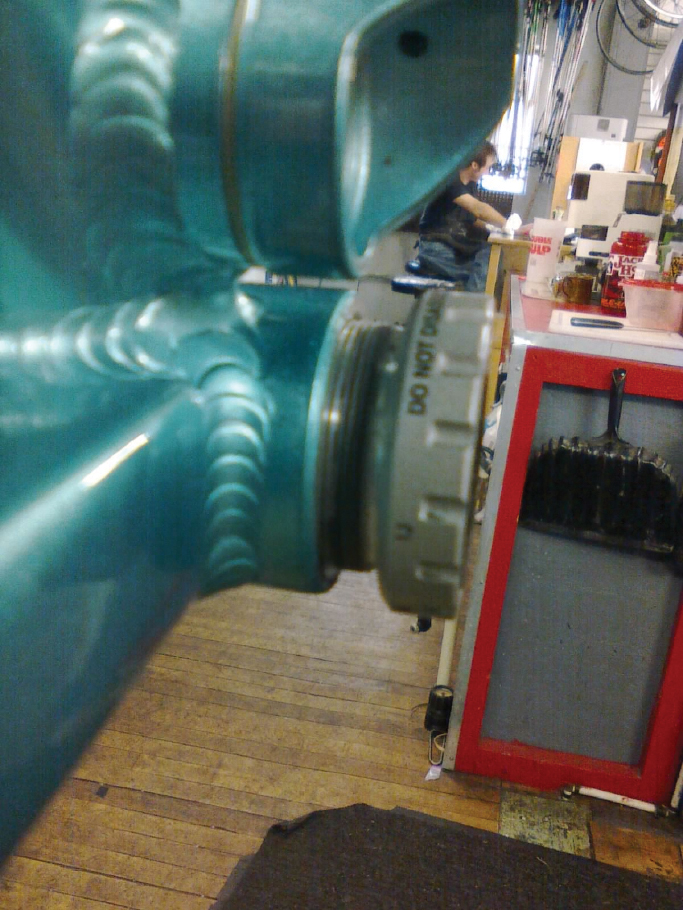
Step 6. Before installing the new bottom bracket cups, wipe a little grease on threads in the bottom bracket shell. Carefully thread the new cups into the shell. Twist clockwise for the left side and counter-clockwise for the right. If the cups do not thread in easily the first three or four turns, stop! You don’t want to cross thread the cup. Remove the questionable cup and inspect the threads for damage. If all looks well, try again. This time, twist the cup in the removal direction (example: clockwise for the right cup) until you feel a little catch. This is the starting thread lining up. The cup should appear parallel to the shell (photo 4). Now gently proceed with the installation again.
Step 7. When the cups are threaded all the way in, using the torque wrench, tighten the cups to 35-40ft-lbs. No torque wrench? Imagine 40lbs on the end of a 1 foot lever (darn tight).
Step 8. Prior to installing the crankset, wipe a little grease on the inside of the left bearing and on the right side of the spindle next to the chainring spider. Gently slide the spindle into the bottom bracket. Take care to properly align the spindle as it enters the left side bearing. Be aware it is possible to pop out the outer bearing seal if the spindle is not lined up properly during installation.
Step 9. With the spindle completely installed, replace the left crank arm. Line up the Shimano crank arm and slide it onto the spindle. There is a key way (photo 2) and it will only go in one place so it does not require force. Then thread the crank cap bolt into place.
FSA and Truvative cranks require two hands, one to hold the crank and one to twist the wrench. Line up the crank and gently twist the crank arm bolt into the spindle. After it engages a enough to hold the crank loosely, give the arm a jiggle to be sure the splines are lined up.
Step 10. To complete the reinstallation, tighten the crank arm bolts to the recommended torque level. The Shimano crank cap requires little pressure. Hand tight is all the torque that is necessary (approx. 3-5 ft.-lbs.). Follow this up by tightening the crank pinch bolts to approximately 10-12 ft.-lbs., alternating side to side until the torque is equal.
For one key release cranks, tighten the crank arm bolt to 35-40 ft.-lbs.
Step 11. Crack open your favorite beverage and celebrate!
Got a bike question? Email Tom at [email protected].