By Eric Ramirez —
Brushing off the Dust
Living in the Intermountain West it’s common to pull your bike down from the proverbial rafters in the spring and find that it doesn’t work quite right. As the cold and snowy days of winter rolled into town, your bike went into hibernation, usually with little prep for storage. For roughly 4 months it was ignored and cold and lonely. It’s almost like it’s acting up to spite you for the seasonal shunning.
The wheels seem loose, there’s a rumble coming from somewhere under the saddle, shifting is not a memorable experience, and there’s a creak. But your bike seemed fine in the early winter months on that last wet ride. You almost went hypothermic and your bike went into the garage wet and dirty.
Now it is time to figure out what is going on here. Some are aware of how to test functionality of the moving parts on bicycles. Others just know something is wrong and it needs addressing. Here’s a little help on things to inspect. Generally, if shifting is off or the bike is noisy, the following information may help.
Testing for Problems
A quick discussion about bearing life: Ball bearings abound on a bike. They allow our wheels and pedals to spin. They also allow us to steer the bike smoothly. Ball bearings exist on full suspension linkages as well. Bearings have a light-duty seal and like all things, seals will begin to break down allowing grease to escape and moisture to invade. Bearings eventually begin to rust from the inside out. Finally, something called pitting occurs. This is when the ball bearings’ smooth running surface (bearing race) begins to look like cobble stone.
The bearings lose tolerances with wear. Some bearings are adjustable, usually cup and cone systems. The other common configuration on a bike is the cartridge bearing. Often pressed into a seat, if worn, it must be pulled and replaced. They are non-adjustable. Most modern headset bearings are a hybrid of the two, allowing for adjustment on the fly as the bearing wears.
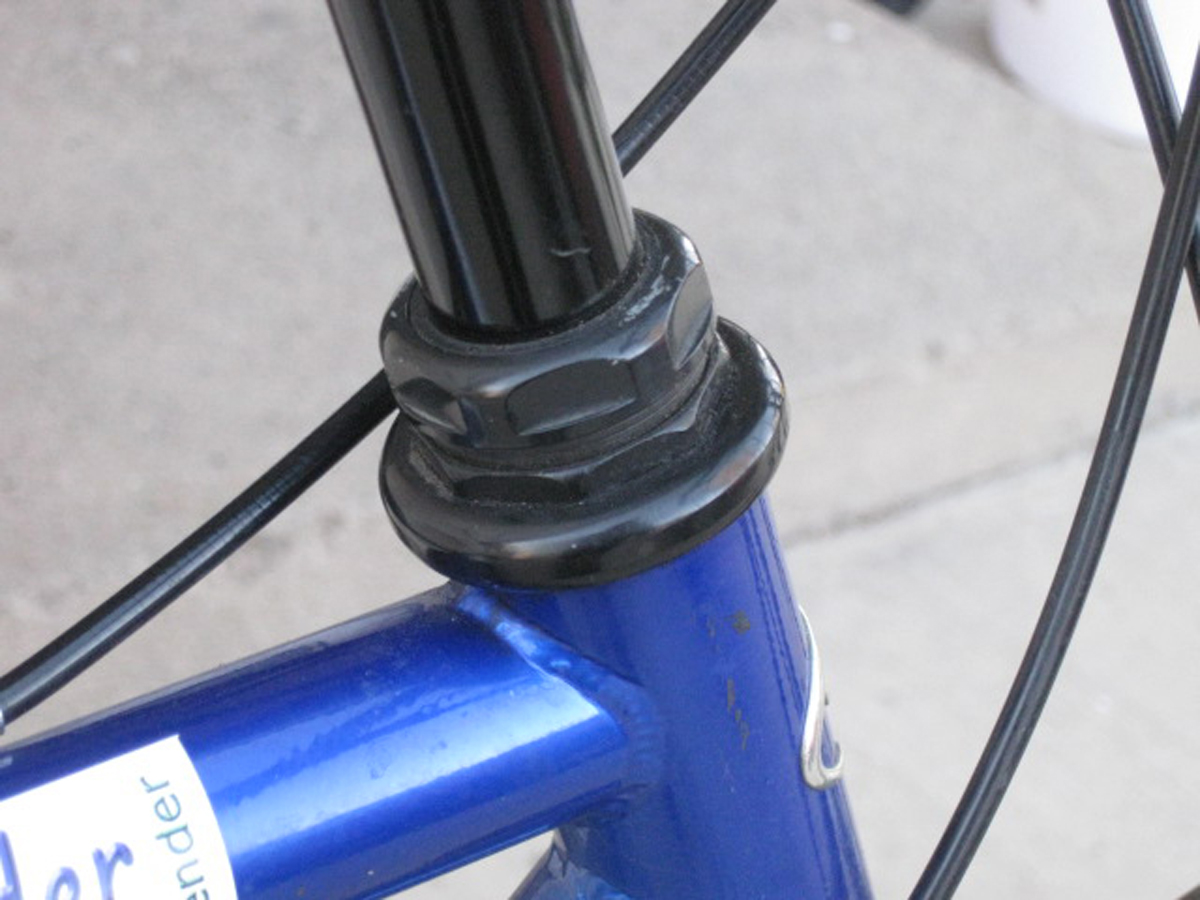
Headset Bearings: Test your headset by grabbing the front brake and rocking the bike backward and forward. If there’s a clunky knock or loose feeling, then the headset either needs to be preloaded anew or there’s rust inside the bearings and you need to replace them. On a high speed road descent this can result in a frightening speed wobble.
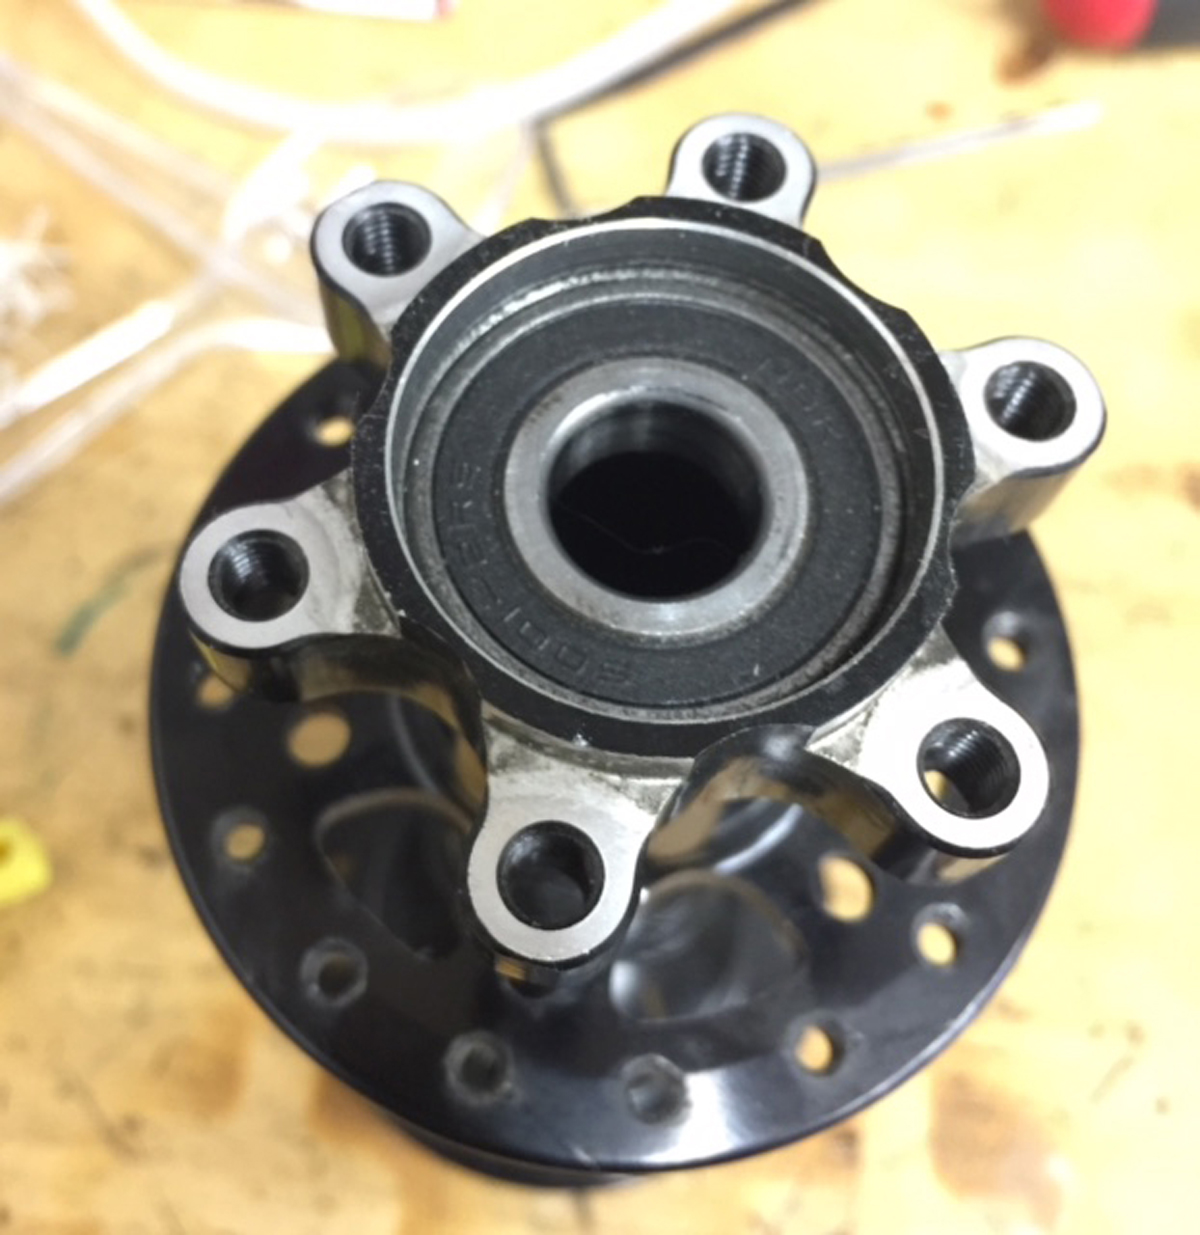
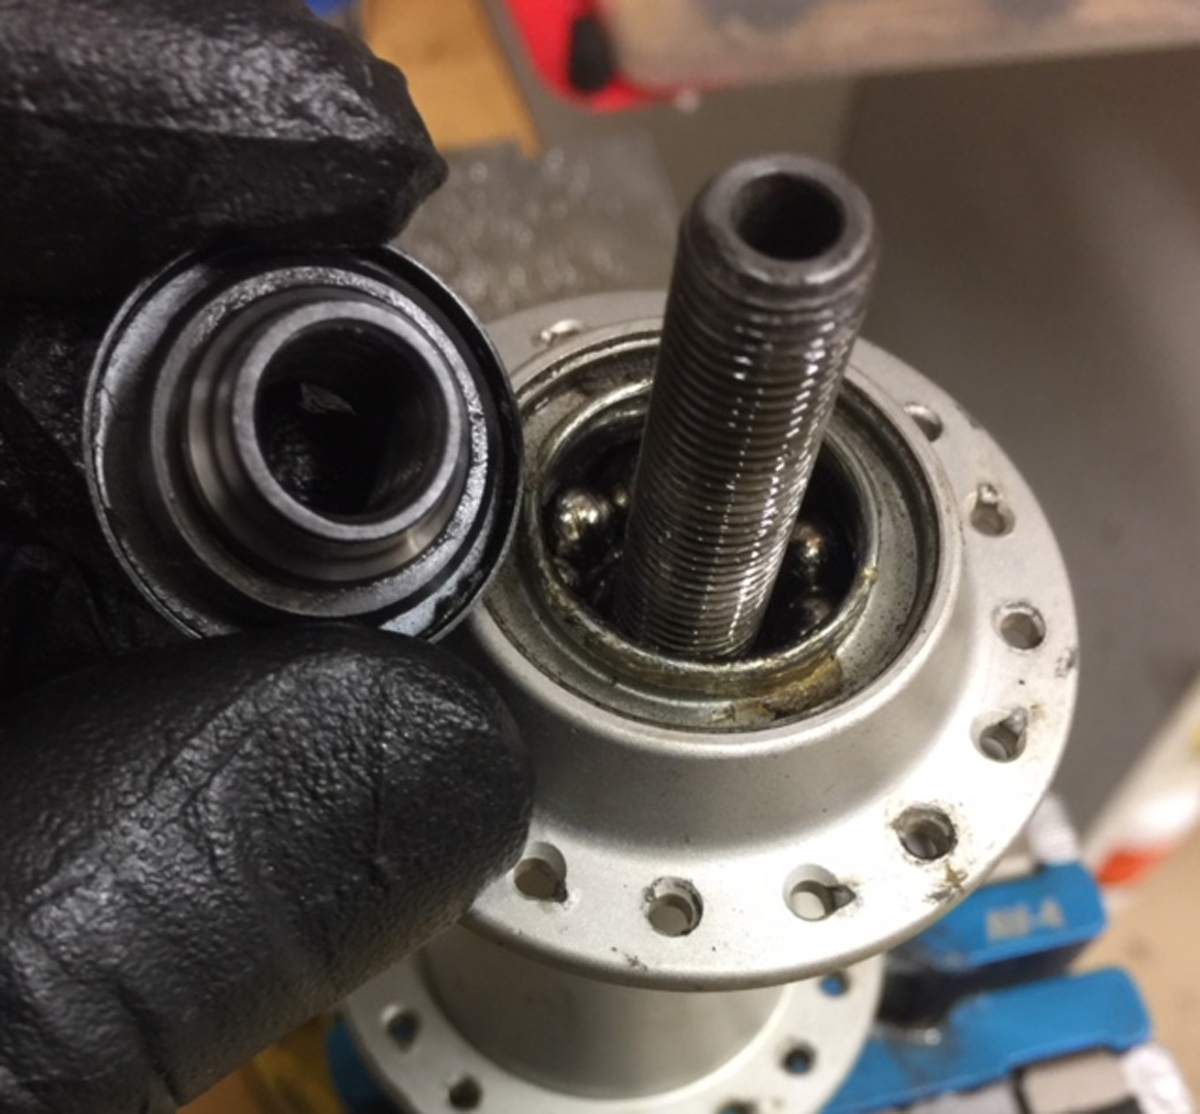
Wheel bearings: Hubs are the center of your wheels and where the wheel bearings live. The manner to test them is by grabbing the wheel and giving a side-to-side wiggle. It should feel solid. If there’s a knock or looseness to the movement then you have bad or loose bearings, either through corrosion or use or both. While riding, it may sound like a rumble.
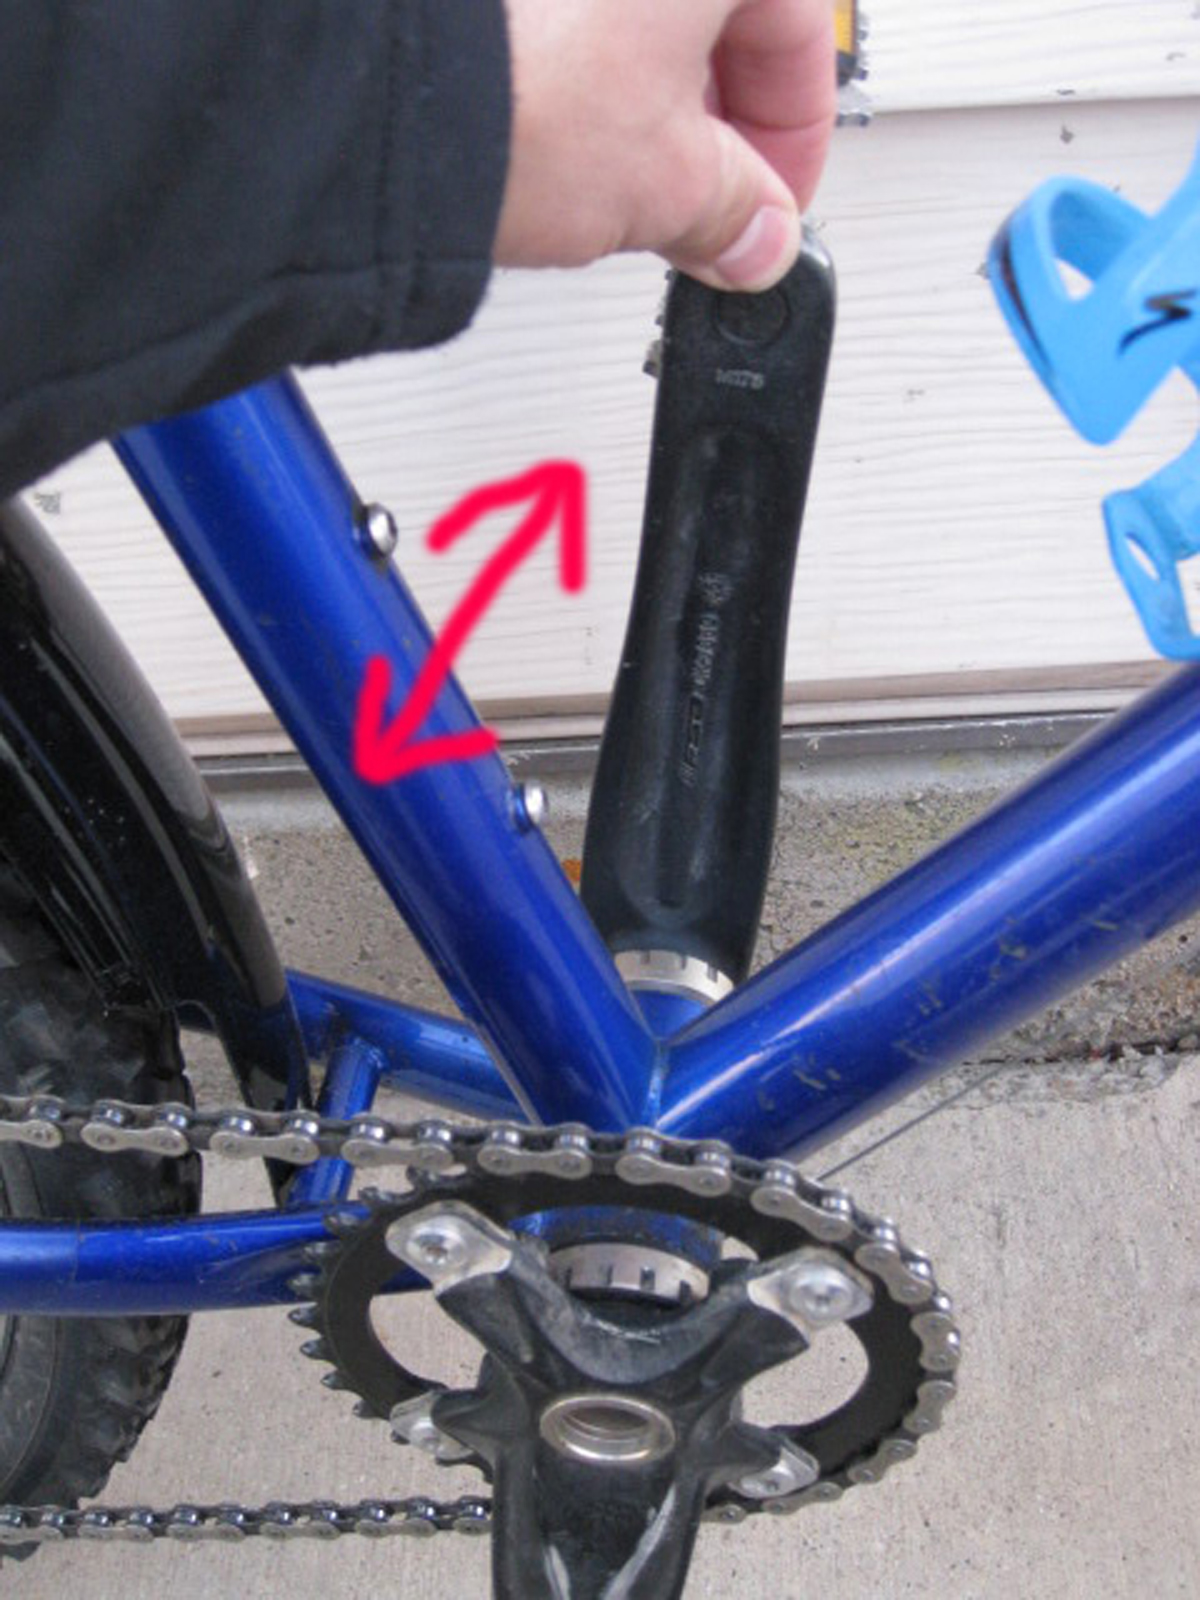
Bottom Brackets: Testing a bottom bracket for play involves a similar movement, by wiggling the crankarms in the same side-to-side test you did with your wheels. Also, on rides, if you hear a nasty creaking or popping noise as you pedal, this could be an indicator of bottom bracket wear as well. Finally, if you can, remove the chain from the chainrings and spin the crankarms lightly. If there is anything but smoothness to the spinning, rough or notchy, then it is time to replace the bearings in the bottom bracket and some times, the entire assembly.
You can see the trend, if a bearing is loose, it needs service. Apply this rule to the pedals too.
Cables and Housing: A little easier problem to deal with is sticky cables and housing. Cable housing has light-duty grease inside a vinyl tube and that goes bad relatively quickly. The combination of the grease drying out and the vinyl breaking down creates a sticky goo that can still allow for clean shifting as the cable is pulled but lousy shifting when the cable is released; ie, shifting into harder gears on the rear gears (cassette).
This can be seen in brakes as well. Cable pull brakes like those found on most road bikes and kids bikes can experience this same thing. If you find that the brakes are hard to pull or that the brake pads don’t retract from the braking surface when released, it’s the same issue.
Some techs talk about lubing cables. My recommendation is to replace the housing and cable; especially since the stuff is so inexpensive compared to some of the other parts on the bike.
Mountain Bikes with Suspension
For those of us owning mountain bikes with suspension, it’s worth mentioning that if you see excessive oil residue on the fork or shock, it’s a good idea to take it to a suspension tech and see if they can help you assess what needs to be done. Often they can service these units at a shop and sometimes they can even do full overhauls.
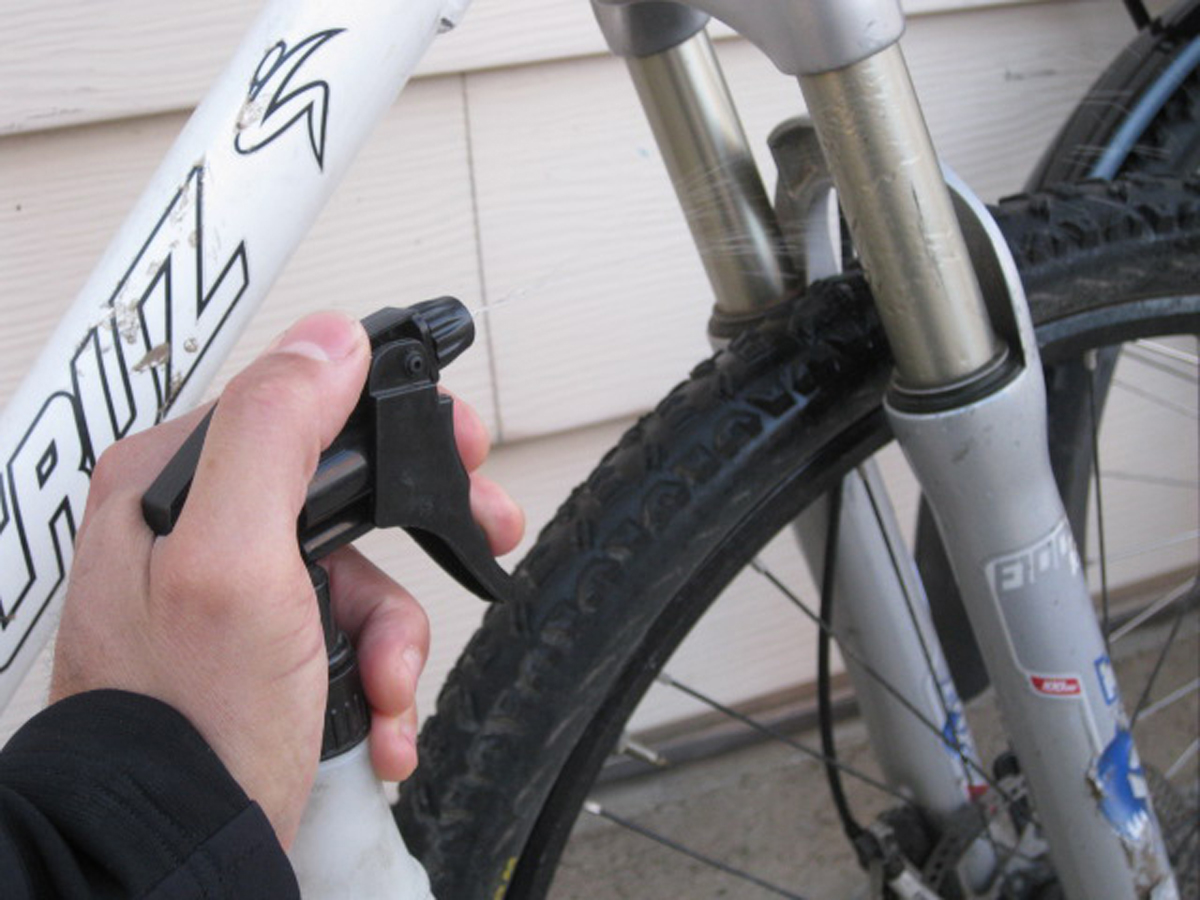
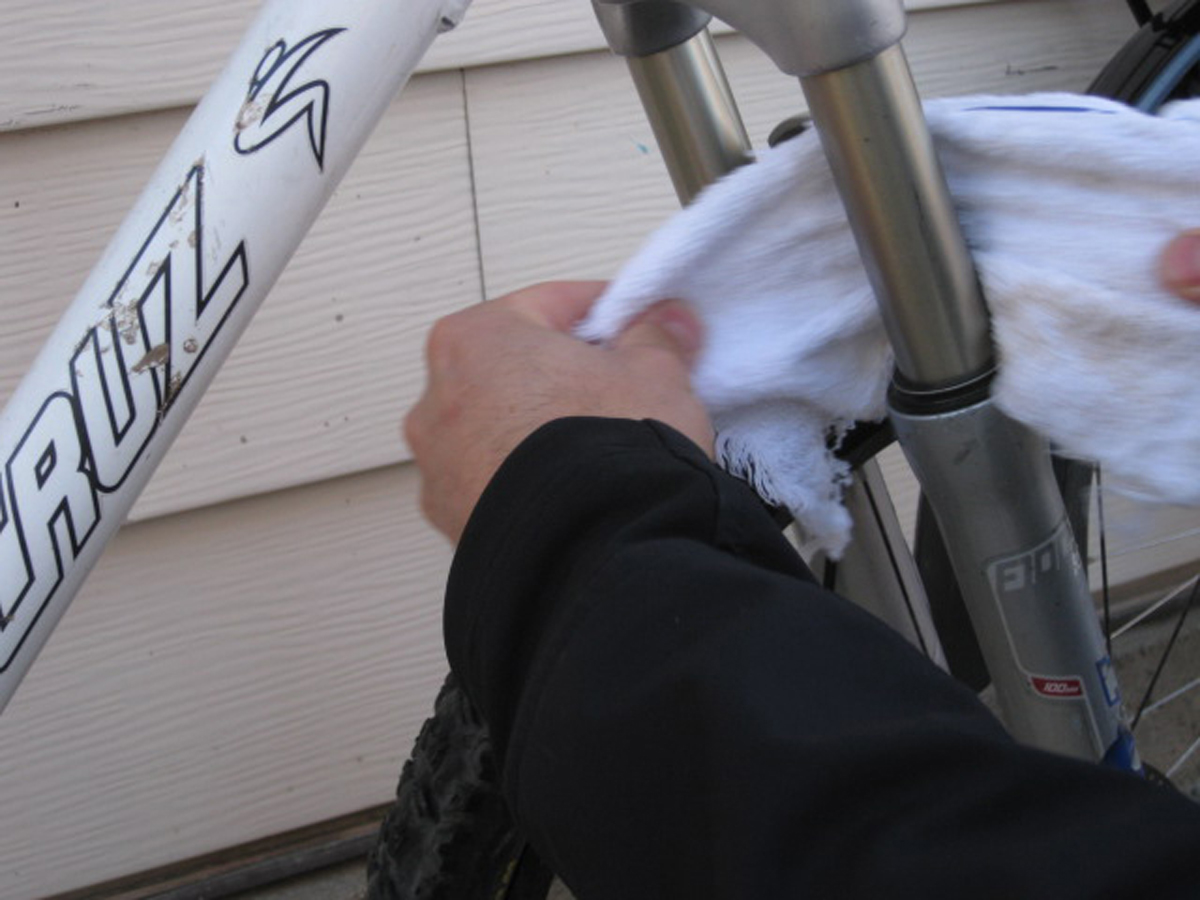
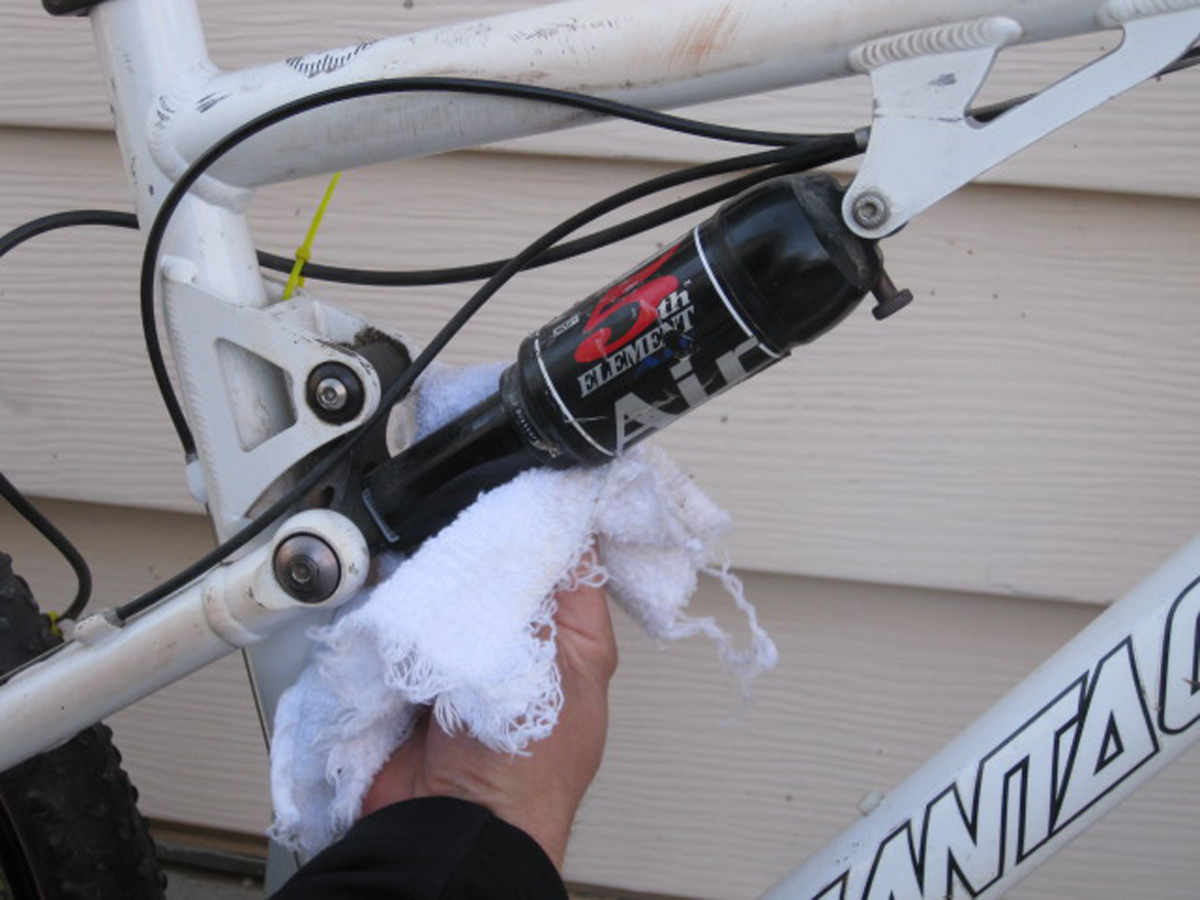
If you’re desperate for a ride make sure to wipe all oil and dust from the suspension. (Pro Tip: put some 91% isopropyl alcohol in a spray bottle and spray the shock down before wiping). The most important areas of concern are the stanchions, shock bodies, and dust wipers. This is where all the external business happens. We’ll cover suspension more in later issues.
Making Repairs
If you know what you’re doing, you can do the repairs yourself. Most folks don’t have the necessary experience or tools. Bikes are becoming ever more complicated machines and it is not as easy to install and adjust equipment. For example SRAM’s Eagle platform does not use the standard chain measuring technique for new chain installation. There are also a standard number of clicks a Campagnolo left shifter makes before it is going to shift the chain to the big ring. My recommendation here is to take what you know about your bike and make a trip to your preferred local bike shop. You might have them tune the bike or fix the one thing that seems to be wrong.
The preamble of do-it-yourself maintenance: If you’re uncomfortable with doing any little bit of it, your safety could be at risk. Let the pros at the shop handle it.
Back in the Saddle
Now that you’ve fixed the majority of wear items on your favorite machine, it should glide effortlessly. Your experience should be quiet and clean. Now you can go back to riding and lubing your chain. At least for a little while.