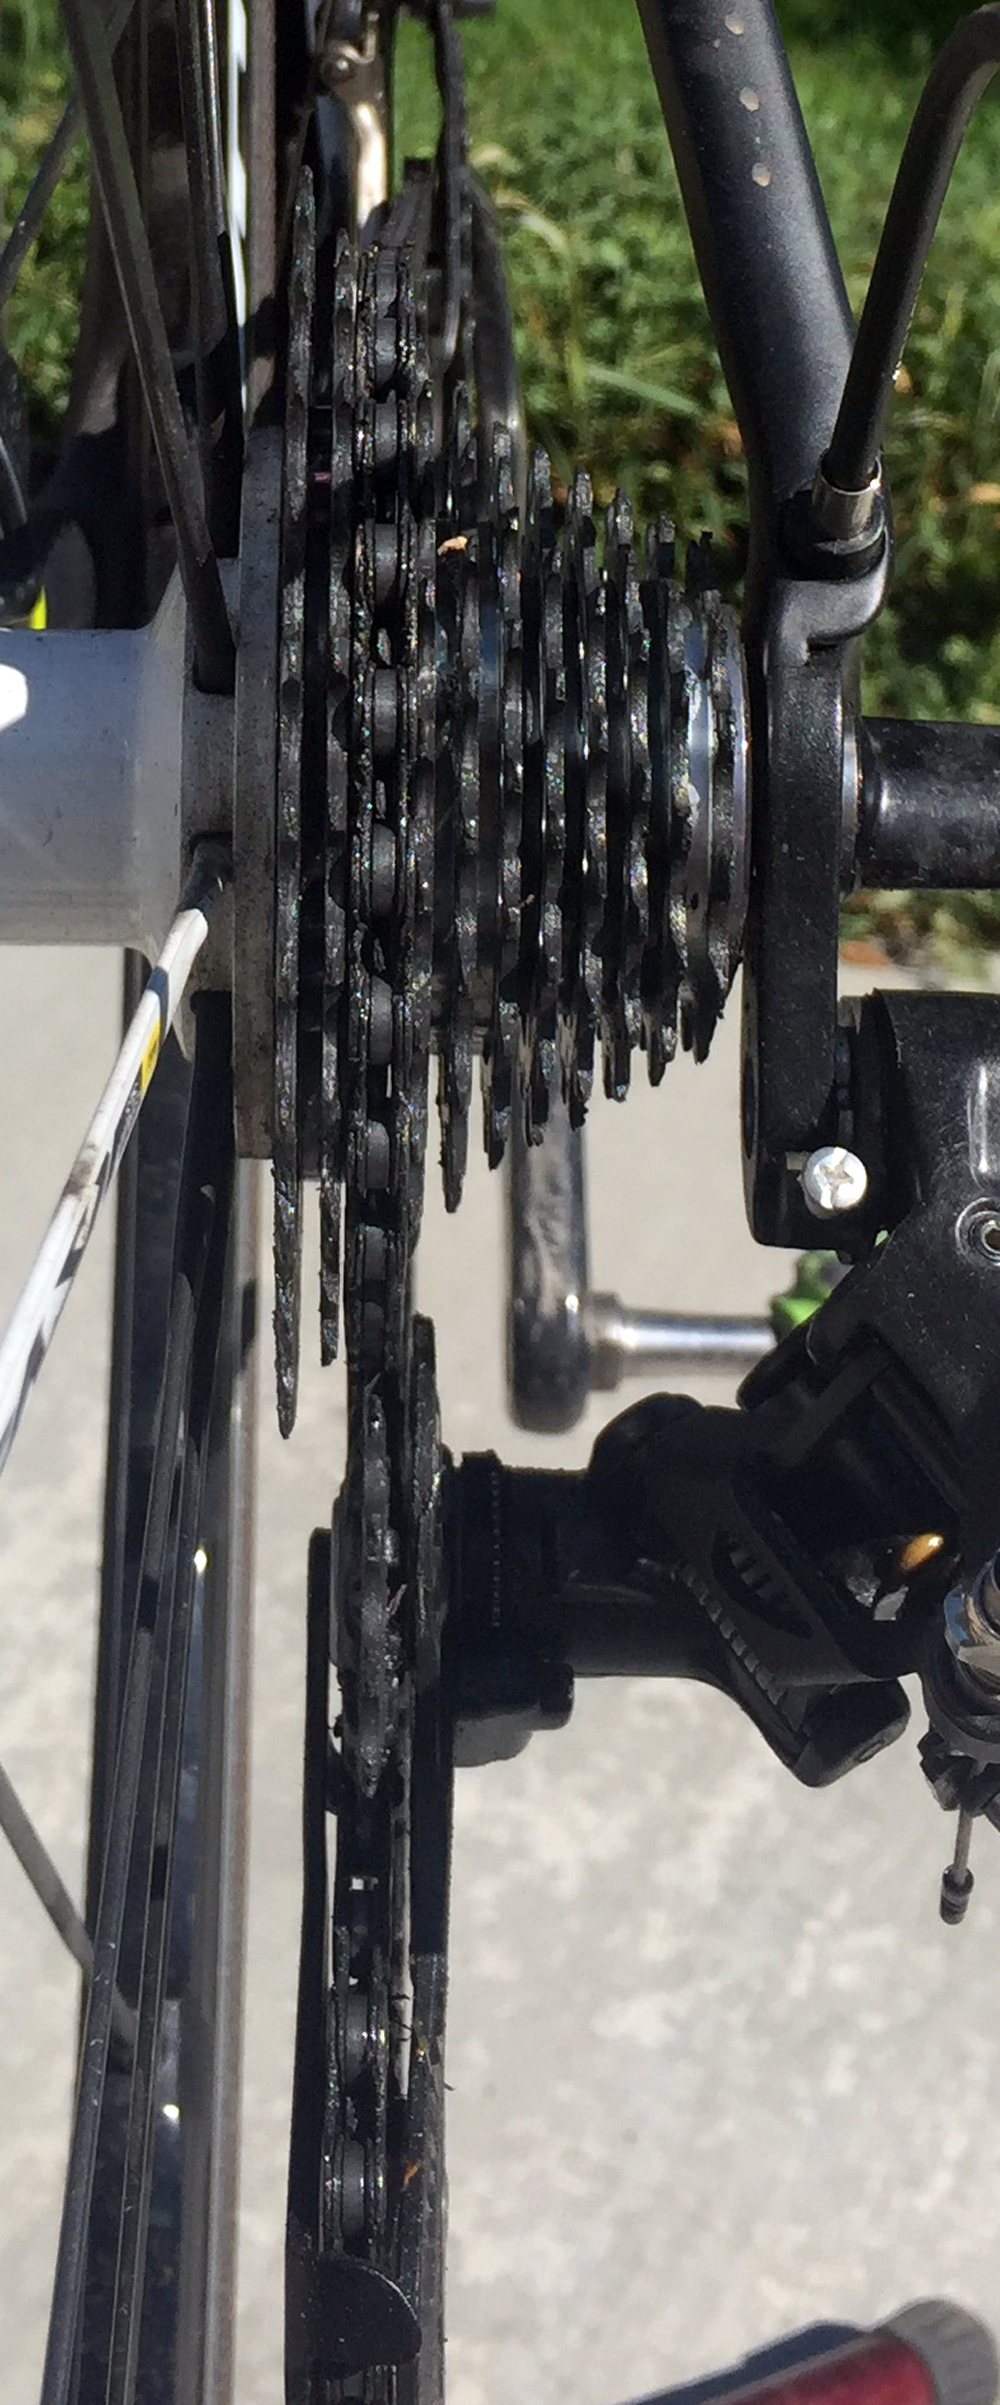
In previous installments of the Mechanic’s Column, we’ve talked about wheel bearings, bottom brackets, and drivetrain. The bike has to be solid from the inside out. If the hub bearings aren’t within tolerances the cassette will flutter at a shift. If the bottom bracket is loose, then the crankset (including your chainrings) will deflect while trying to shift the forward gears at your feet. I also discussed drivetrain wear and how that can affect performance in both shifting and pedaling under load.
We’ve already fixed the shifting resistance by replacing cables. But for some reason the rear derailleur shift isn’t happening smooth or it seems that the derailleur is simply missing the correct spot.
Front and rear derailleurs facilitate the shifting by simply pushing the chain into the next gear. We talked about ramps and pins and how these carry the chain the rest of the way onto the corresponding gear, whether cassette cog or chainring. Derailleurs are also extremely exposed to the elements: water, dirt, children, crashing, etc. They are built with this in mind and are very durable. The more you spend the better they are in every way: durability, shift quality, return spring strength, weight, and aesthetic.
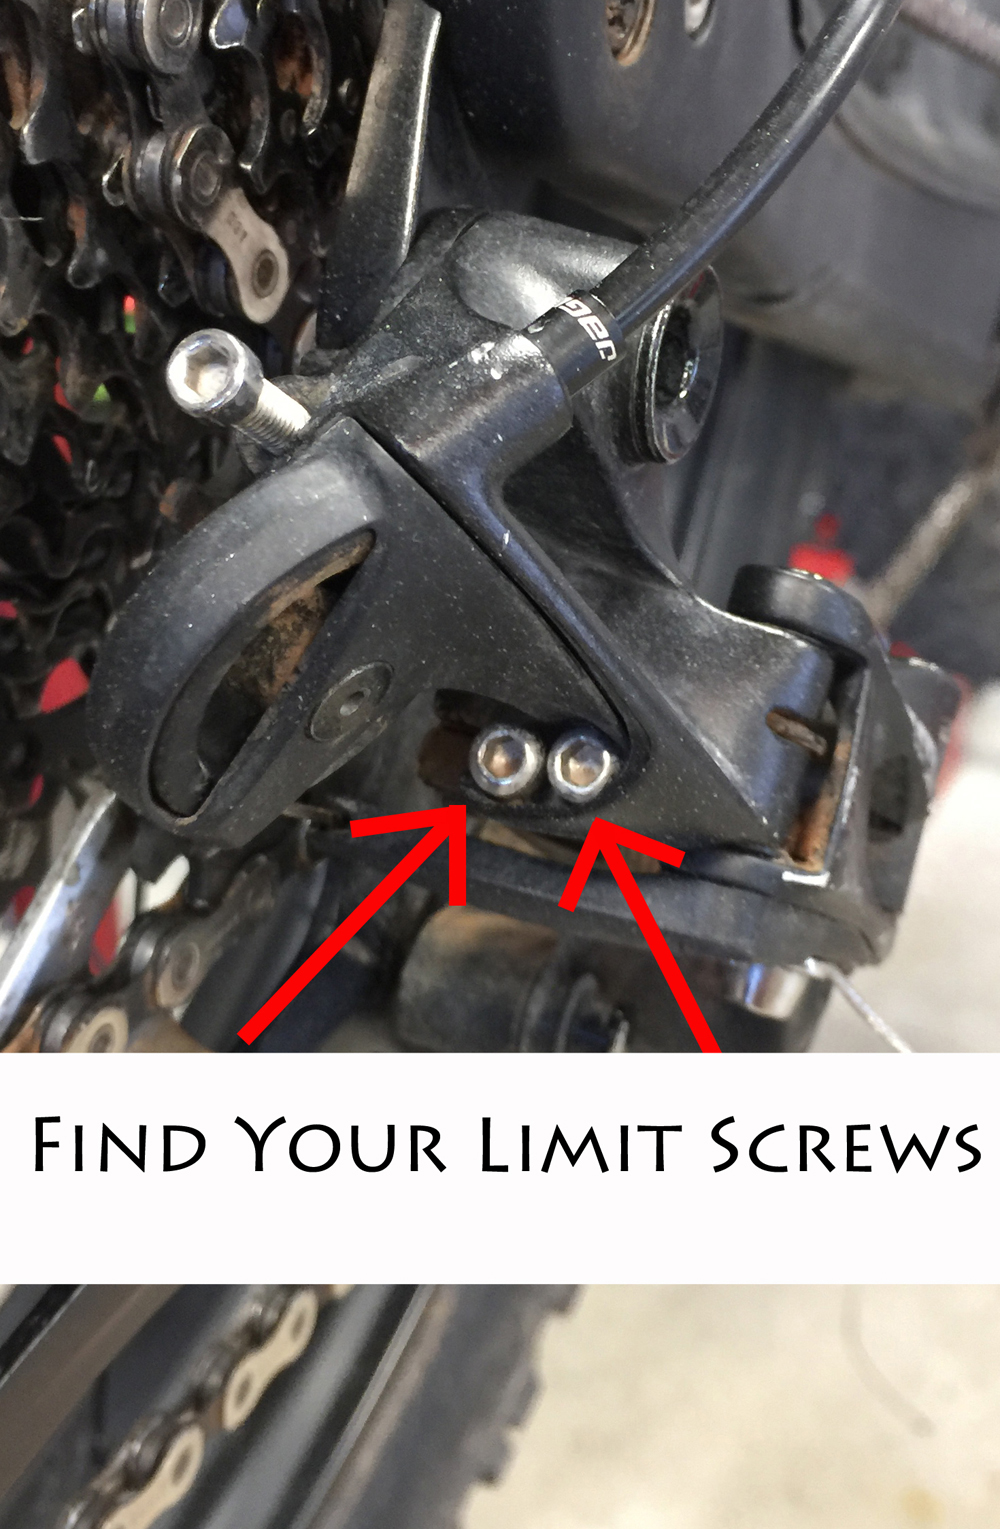
Derailleurs all share a common set of control features: Limit screws, both high and low, cable set screw, a barrel adjuster on the rear (typically). Different brand derailleurs also have different pull ratios from others. SRAM and Shimano and Campagnolo all have different cable pull ratios and are largely incompatible with each others shifters.
A few things to consider with the rear derailleur:
- Alignment of derailleur and derailleur hanger
- High and Low limits
- Cable tension
The following information is presented assuming the bike will be in a work stand.
Alignment:
Derailleurs have an alignment requirement and this must be set before high and low limits are set, before the cable is fastened or even installed. A rear derailleur must hang on a parallel plane to the rear wheel and the cogs it services. I first take a look at the derailleur hanger, the part of the frame that the derailleur connects to.
When installing a derailleur or checking for shifting issues this alignment is the first thing I inspect. No adjustment will matter if this alignment is off. Don’t assume because it is a new bike that this is properly set. I’ve seen poorly aligned derailleurs hangers on new and crashed bikes alike. Often times I find that a rear wheel is installed cock-eyed in the bike and this will have the same effect as a bent derailleur. So, make sure the wheel is in straight.
If the derailleur is hanging at an angle rather than vertically it would be a good idea to take it to shop and have the techs align it for you. They do it all day and can usually get it turned around quickly.
“High” Limit Screw Setting:
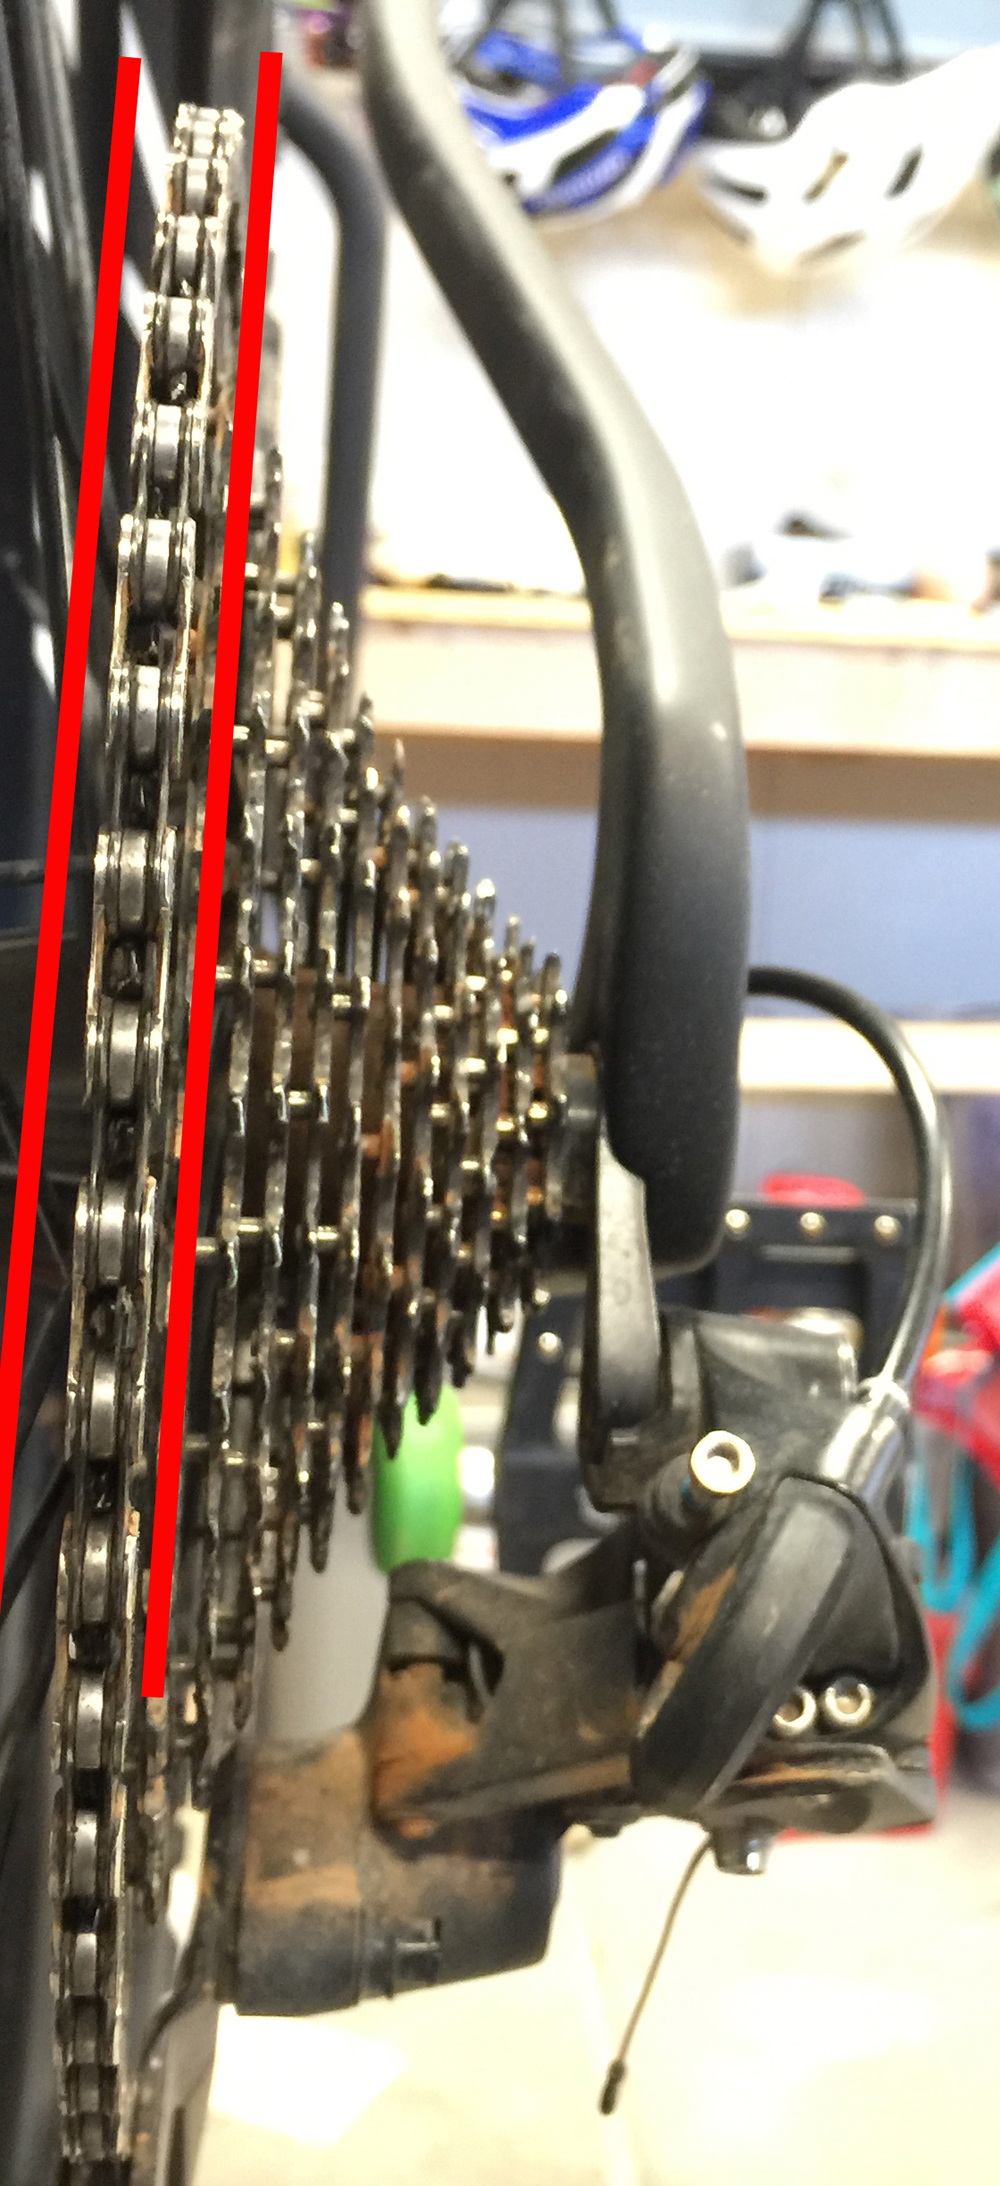
Next, with the rear derailleur installed, I like to disconnect the cable from the fastening bolt and see how the high limit is set. The top pulley of the derailleur should feed the chain directly onto the smallest cog, or the cog furthest out from the center of the wheel. The corresponding screw to set this is usually marked with an “H”. Rotating clockwise will set the “H” limit toward the center of the cassette.
Give it a gentle pedal and the chain should pass smoothly onto the small cog without making a whole lot of noise and with no help. If it sounds like it wants to shift into the next gear or into the space between the cassette and frame, then readjust. Once the derailleur is smoothly feeding the chain onto that cog your “High” limit is set.
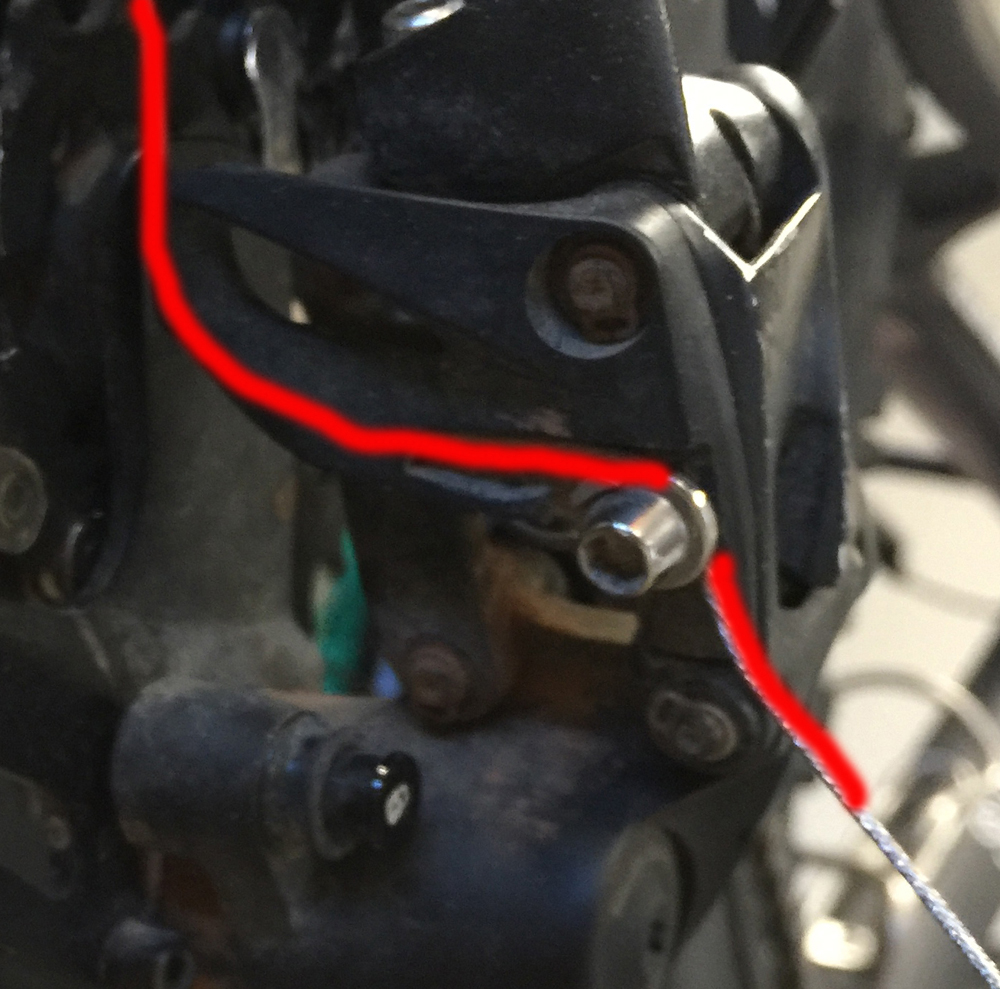
Attach the Cable:
Make sure the barrel adjusters are in all the way so that it takes up no cable slack, both on shifter and rear derailleur. Make sure the shifter is fully released so that the cable is coming out of the shifter at the high gear setting. Now remount the cable to the fastening bolt. This can be tricky. Several derailleurs have a proprietary mounting route for the cable to follow. Look at yours and make sure it falls into manufacturers specifications.
Pedal and shift (slowly) through the range; the chain should readily shift to the next gear and make little to no noise outside of the chain rolling onto the cogs. Watch and listen to the chain as it goes from gear to gear. You may need to adjust the cable with the barrel adjusters. As the cable is tightened with the barrel, the derailleur is forced to align accordingly. I like to start with a quarter turn at a time.
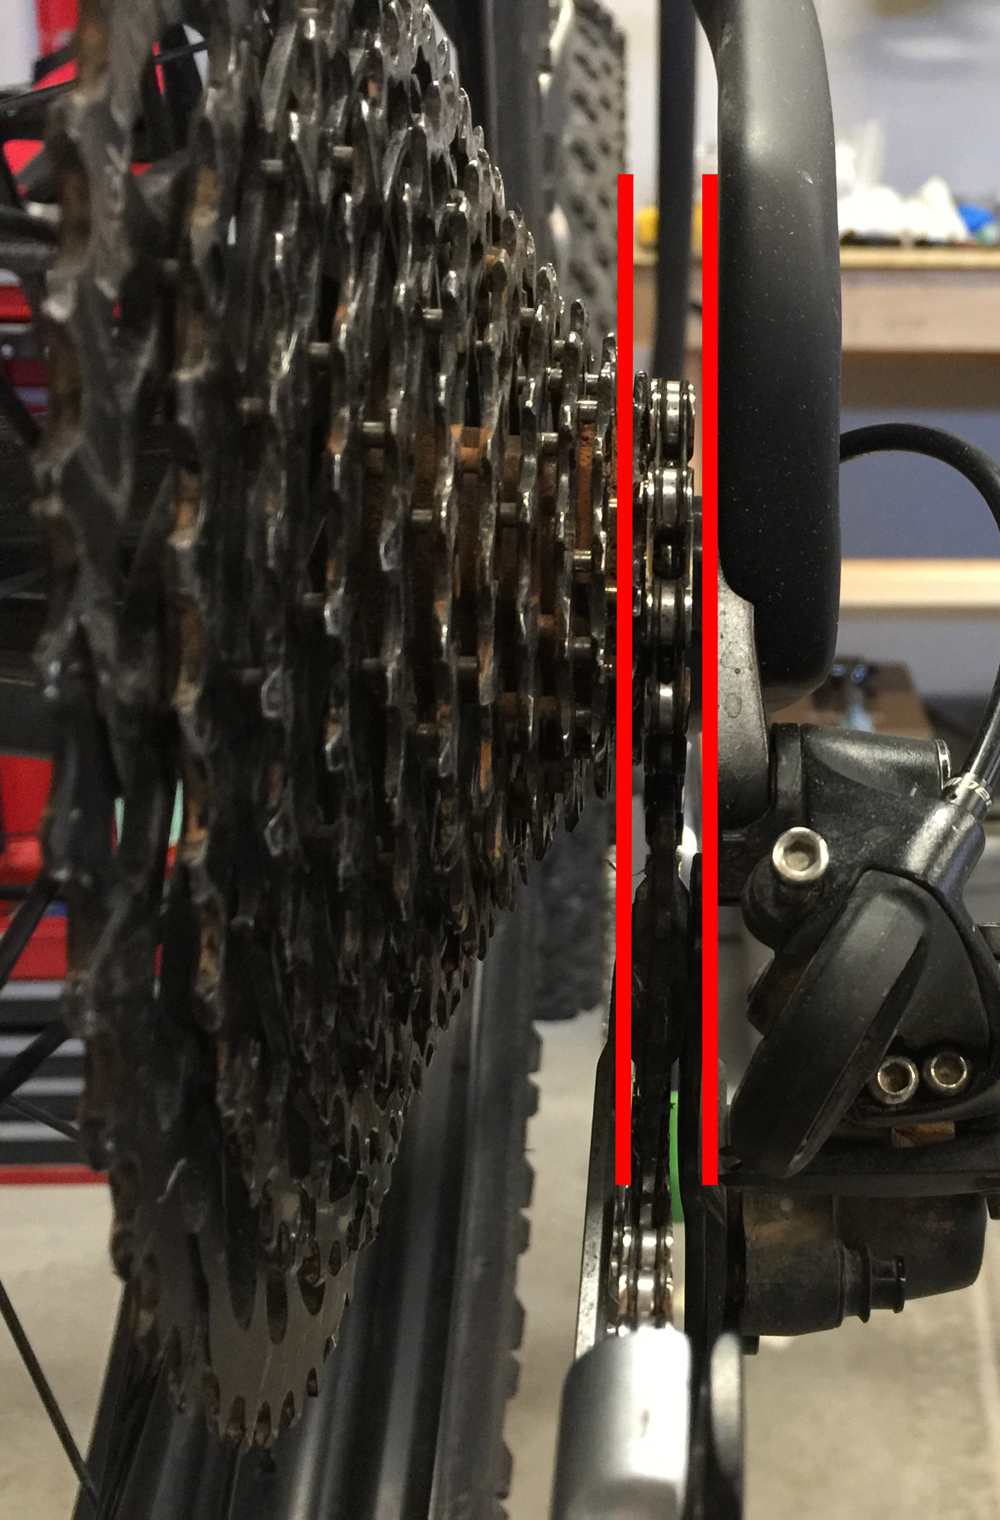
Shift to the climbing gear, whatever the “Low” cog is. These days it could be a 50 tooth cog but it will physically be the largest gear on the cassette. The chain should feed from the derailleur onto this cog easily. At this point give the derailleur a little push and see if it resists the motion and remains on the low gear.
“Low” Limit Screw Setting:
Oops, the chain is now in your spokes! This is a big oops, and the “Low” limit screw needs to be adjusted so that this never happens. Screw the limit screw in just a bit until it stops throwing the chain off the low gear and feeds the chain nicely onto the largest cog. Repeat shifting through the range while pedaling the bike. If the derailleur won’t send the chain onto the largest cog, then the “low” limit needs to be withdrawn just a bit. Do this until it will shift onto the cog but not into the spokes.
Test ride the bike around the neighborhood, gently avoiding abrupt shifts. Shift thoughtfully through the gears one at a time. Look for any hesitation. You may have to readjust some of your settings, starting with cable tension, to get the shifting spot on. A little trial and error here can go a long way to building the necessary experience to making these adjustments quick and efficient, and in the field.
Up Next: I’ll discuss a rear derailleurs “B” tension and why it’s so mysterious.
Eric has 20 years experience working on bikes, starting in Park City. Today he’s a head technician at a shop and maintains a blog about wrenching and adventures at angrybikemechanic.com
Do you take questions about biking from readers?