By Tom Jow
Last summer in my article, “Is a Single Ring Drive on Your Mountain Bike Right For You?”, I outlined the details of the popular Sram XX1 and XO1 single ring drivetrains. I also compared those details to a DIY 1 x 10 speed upgrade using aftermarket parts. During the winter I was the recipient of an eThirteen 42 tooth cog kit (from a neutral source). It was then I decided to demonstrate how to perform this upgrade.
clockwise
There are few parts necessary for this conversion. A rear cog, a special narrow/wide chainring and a quick link for the chain. The procedure for installing these components, as well as removing the front derailleur and shifter is not too difficult. Total time for the job was approximately 1 hours. The tools required are such that would be standard fare at any home mechanics workbench. However, for those not yet completely equipped, here is a list:
Cassette Lockring tool
12 inch Adjustable Wrench or Cassette tool handle
Chainwhip
Torque wrench capable of 40n-m (optional)
Pliers
Park MLP 1.2 chain link pliers
Chain tool
Metric Hex Key wrenches, 2-10mm
Torx Key wrenches T20,T25, T30 (depending on components)
Cable Cutters
#2 Phillips Screwdriver
Isopropyl Alcohol (for removing/ installing friction grips)
Now let’s begin!
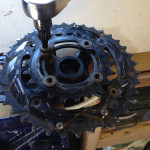
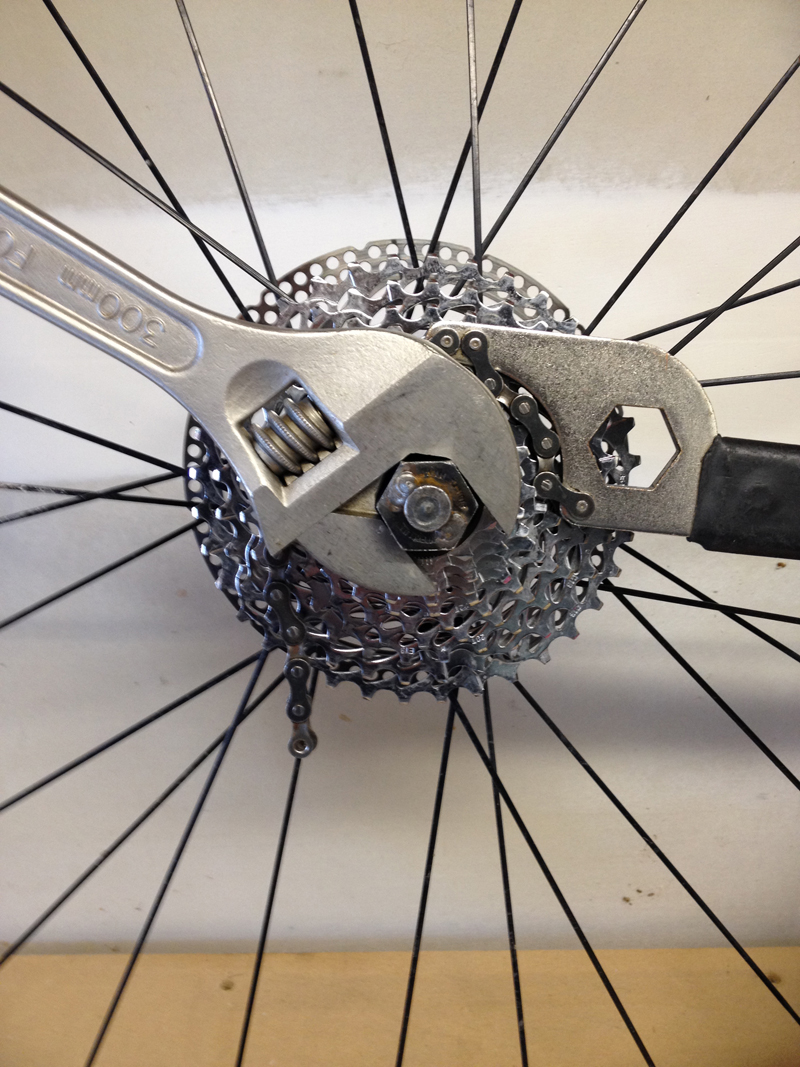
Step One: Remove the cassette.
Place the chainwhip on the cassette, holding firm in the drive direction. Insert the cassette lockring tool and with a long lever, turn it counter clockwise.
Remove the lockring, and then the cassette. I like to pinch the whole cassette between my thumbs and fingers while lifting up. Be careful, there are parts that like to roll away when dropped.
Step Two: Install the conversion cog and reassemble cassette.
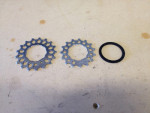
Before installing the new cog, verify if a spacer is built in or will be required from another location. If the spacer is not integrated, use the one from between the 17 and 15 cogs.
Next, align the index spline of the cog and freehub body, then slide it on. Continue with the large, then medium cog groups. At this point, since we added a cog, we must remove one. Choose between the 17 and the 15. I chose the 15 (as do most others from what I’ve read). If your conversion cog has a built in spacer, you will also leave a spacer out.
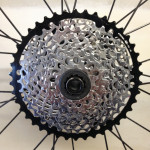
Place the 13 and 11 cogs on top, grease the lockring threads, and tighten it to 40 newton-meters of torque( pretty darn tight).
Step Three: Remove chain, crank arms, chainrings
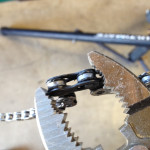
Disconnect the chain. If the chain has a removable link such as Sram, or KMC use pliers or the Park master link pliers to disengage and remove the link. Shimano chains require pressing a pin out with a standard chain tool.
In order to remove the inner chainring, the right crank arm must be removed. In most cases, this also means removing the left arm and sliding the right arm and spindle out. On Shimano cranks loosen the two bolts and lift the safety washer to remove the left arm. Sram and FSA cranks have a self extracting bolt. Just remove the bolt and the arm is pressed off the spindle. Slide the spindle out. A few light taps with a hammer may be required.
Once the right crank is out, the inner chainring can be removed. Use caution removing these bolts. There are 30+ chainring teeth waiting to slice your knuckles. Leather gloves can be your friend.
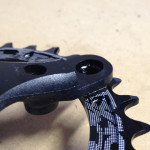
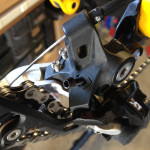
Step Four: Install new chainring, remove front derailleur
With the old rings removed, the new ring can be installed. The chainring I used had the chainring nuts machined in. Double check that the chainring nuts do not protrude beyond the crank arm spider. If so, singlespeed chainring bolts and nuts will need to be used.
Grease the chainring bolt threads and tighten to 8 newton-meters torque (not too tight).
While the crank is out, remove the front derailleur. Cut the cable end off. Loosen the cable pinch bolt and remove the cable. Remove the derailleur mounting bolt(s) and remove derailleur. Next reinstall the crank arms. Tighten Shimano crank arm bolts to 14 newton-meters torque. Tighten the Sram or FSA crank bolt to 48 newton-meters torque.
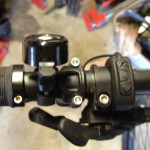
Step Five: Remove the front shifter
Remove the front derailleur cable and housing from the frame. It may he held on with plastic ties, clips, or clamped on. Finally, remove the front shifter. To do this, the left grip must first be removed. If it’s a lock-on grip, no problem. Just loosen the screws, pry out the end plug, and slide the grip off. Old school friction grips require compressed air or lubrication to get them off. Since most home mechanics may not have compressed air, let’s go straight to the lubrication method. Carefully slide a thin screwdriver between the grip and handlebar. Spray isopropyl alcohol into the opening. Twist and pull until the grip comes off.
Then, loosen the screws holding the brake, shifter and anything else in between. Slide it all off until the shifter is removed.
Reinstall the brake, bell and grip. Position the brake lever to match the right side.
Final step: Install B-screw, reinstall chain, replace rear wheel, adjust rear derailleur
We’re almost finished. If your kit comes with a replacement B-screw, replace it now. The function of the B-screw is to adjust the position of the upper pulley under the cassette for best shifting.
When this is done, reinstall the chain (Shimano chain owners use a new chain or a quick link).
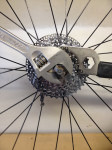
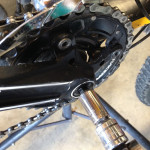
The last task is to replace the rear wheel and adjust the derailleur. Shift the chain into the lowest (largest) cog. Adjust the B-screw to approximately 6mm ( ”) of clearance. Ideally when shifting to the low gear, the upper pulley should not bump into the cog. Nor should it ride up tight under the cog which can make a grinding sort of noise. The limit should require no adjustment and cable tension adjustments should be minimal.
Next Month: A review
With about four weeks between issues, I should have put enough hours in for a good on trail review. By that time I will also have a good comparison of the gear changes as well. But that wasn’t so hard was it? Three parts, twelve tools and a couple hours time for a functioning 1 x 10 drivetrain?
Notes:
The reference to narrow / wide chainring concerns the shape of the teeth. By alternating the shape of the teeth from narrow to wide, combined with a “clutch” rear derailleur, this tooth profile prevents the chain from derailing during rough conditions. The chainring I purchased was the RaceFace brand, normally priced around $60.00. The smallest narrow / wide chainring available for a 104mm BCD is 30 teeth. There are smaller rings available from other manufacturers for the inside position (64mm) sized from 24 to 28.
The eThirteen cog kit costs $69.00. This is not the only cog kit in production.
A 10spd quick link ranges in price from about $3.00 – $15.00. I did not shorten my chain and over three rides has not been a problem.
More information regarding removing the cassette and crank can be found at:
“How to Replace a Chain and Cassette”, Cycling Utah, March 2010
“Replacing a Bottom Bracket”, Cycling Utah, April 2012.