By Erica Tingey —
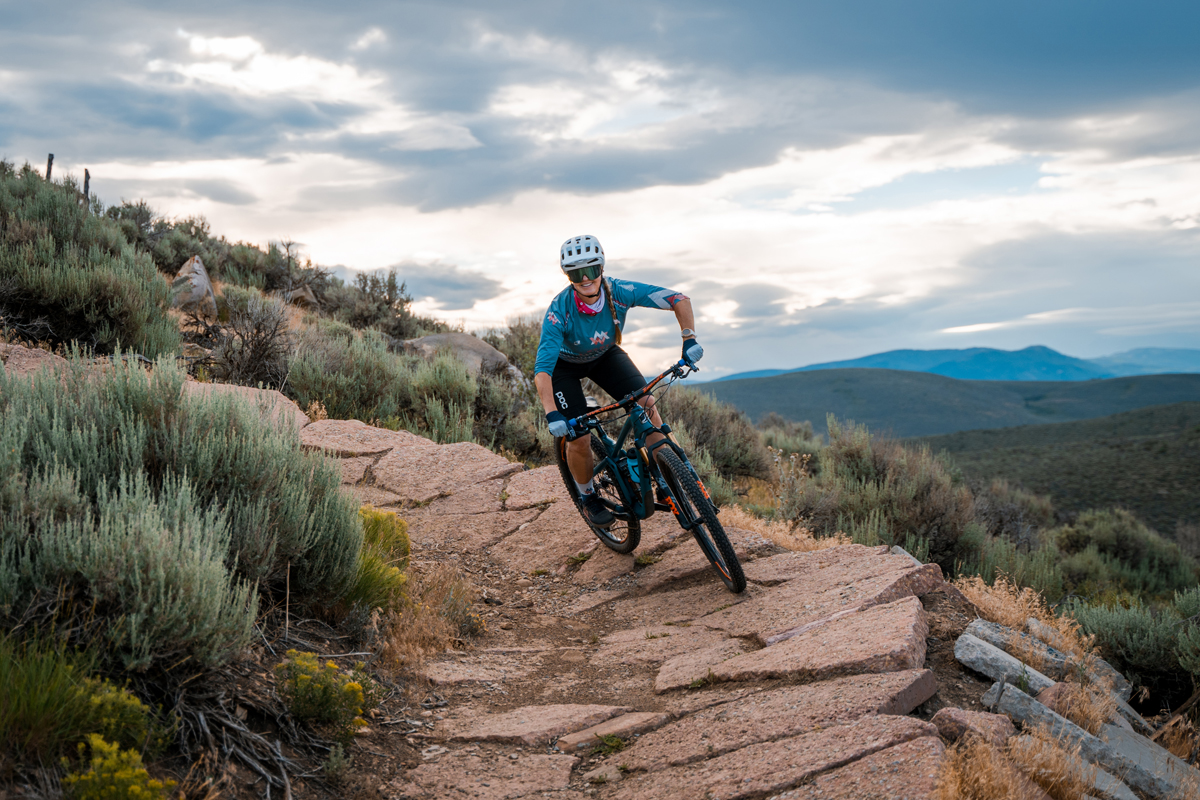
Tip #1: Heavy Feet, Light Hands
Correct body position is an essential part of going faster on a mountain bike. For descending, you should be in the strong, but relaxed “ready position.” Level your pedals, get up and off your seat, and keep your elbows and knees slightly wide to allow for range of motion side-to-side and front-to-back.
Think heavy feet, light hands, and you will naturally settle into a good position. You want your weight to be very much in your feet, and you want to hold the bars with your hands, but don’t grip them to avoid the common beginner mistake of flexing and gripping everywhere and feeling everything you hit on the trail bouncing through your whole body.
Be strong by engaging your core and glutes and working your quads while simultaneously relaxing your upper body. The “ready position” helps you to absorb features on a trail. The key is staying relaxed and letting your bike move around under you.
Tip #2: Look Ahead
You can break down where you look while mountain biking into the now and the next. Think of the “now” as one to three seconds in front of you, and the “next” as four to six seconds in front of you.
If you’re only looking in the now, you’re not prepared for what’s next, and if you’re only looking in the next, you’re not prepared for what’s now. In general, your eyes should be on the next, but allow them to scan the now when necessary. Don’t tilt your head to look; keep it level, and scan with your eyes.
Avoid tipping your head to look down because doing so will make you automatically grab your brakes; it’s an instinctual reaction that happens when your brain doesn’t know what’s next. It happens because the fluid in our inner ears tells your brain when you are out of balance, so when you dip your head, you’ll instinctively feel a corresponding urge to brake.
Tip #3: Ease The Squeeze
Many riders make the mistake of squeezing their brakes too hard and too fast – something that’s especially dangerous at high speeds. Others insist on only using their rear brake because they’ve learned to fear the consequences of going over the bars from overusing their front brake. That’s why it’s important to get to know both of your brakes BEFORE you try to go fast.
Practice using both brakes simultaneously in the parking lot as you go slowly on a stable surface, then add some speed. When you use only your rear brake, you have less stopping power, so your rear wheel is more likely to lock up, lose traction, and slide out, which is the definition of skidding. Skidding is considered bad form and can ruin some trails (especially those in Utah). Keep in mind that 80-90% of your stopping power is up front, and remember that your brakes aren’t just on or off. Think of using them like squeezing a tube of toothpaste; do it gently and with precision.
As you go faster, you’ll need to counteract the forces that tend to throw you forward when you brake. Do this by braking while in a body position with a lower center of gravity. Lowering your torso while shifting it back a tiny bit and dropping your heels are two ways of doing this.
Tip #4: Know Before You Go
Most of us start riding our local trails, and eventually, we get to know them pretty well; sometimes they even get kind of boring. As that happens, it’s normal to be curious about different trails in other places and want to go exploring, but prior to heading somewhere new, do some basic research. It can go a long way toward helping you have a successful adventure.
Before you go, download the Trailforks [or other relevant-to-your-area] app on your phone, and learn how to use it. Read about the trail, and understand what to expect, then take a moment to check signs at the trailhead for any updates. For example, are you going on a one-way trail, and if so, are you planning to ride it in the right direction? Is it a hiking-only trail or a horse trail? As we’re seeing more users on the trail than ever before, it’s even more important to respect the rules of the trail and be kind to everyone out there.
Per standard trail etiquette, hikers and horses have the right of way on multi-use trails, and so do all users who are traveling uphill.
Tip #5: Be Prepared
Be sure to bring tire plugs, a suitable tool to insert the plugs, a spare tube, a pump and a basic multi-tool so you’ll have a way to fix flat tires and other common mechanicals. Even if you don’t know how to use all the tools yourself yet, someone is more likely to stop and help you if you have what you need to make the repair.
Always take some type of riding fuel (bars, trail mix, fruit snacks). Take a little more than you need because you never know when you or someone you encounter will end up needing them.
Checking weather forecasts prior to departing is also a good idea so you can bring the appropriate extra layers to accommodate changing conditions, especially in the mountains, which are more prone to surprise temperature swings and storms.