By John Higgins
This month I am going to delve into the primary bike fit adjustments on a mountain bike and offer up some do-it-yourself guidance for checking and adjusting your setup. Most of this is geared toward your cross country, endurance (not enduro), and trail rider, but much is applicable for any bike.
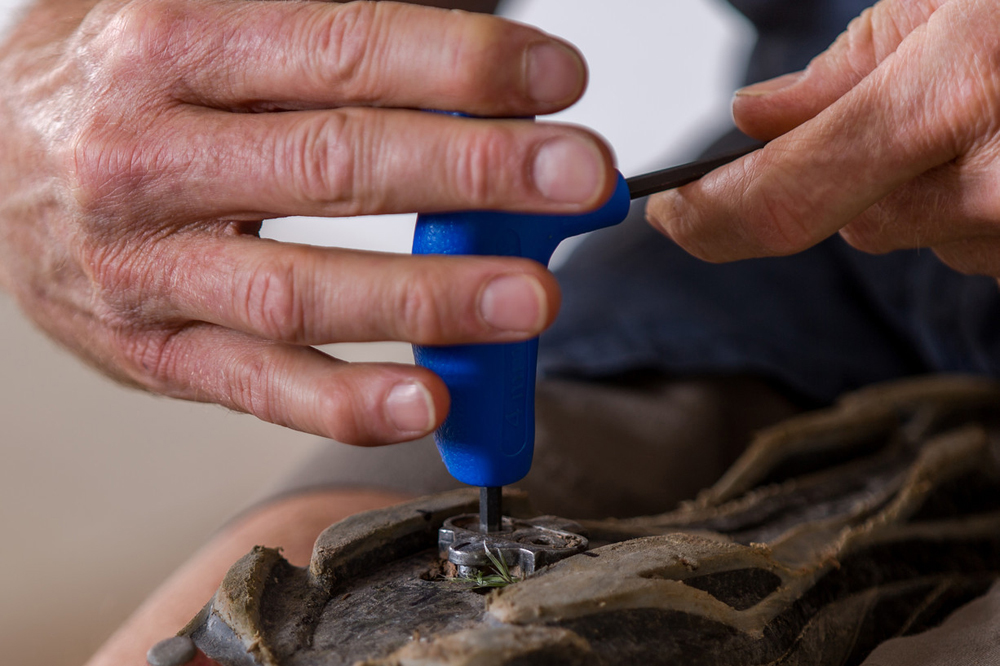
Foot to Pedal: If you are riding on flat pedals, then your foot is going to find its own position on the pedal, and mostly likely your foot will be further forward on the pedal than if you were clipped in.
If you are using cleats, then there are three positional adjustments: forward/back, in/out (side to side) and rotational alignment. A general guideline for forward/back position is to locate the first and fifth metatarsal heads (ball of foot for the big toe on the inside and the little toe on the outside), and to align the cleat bolt-holes between these, or biased towards the 5th met-head. This gets you off your toes and moves the cleat contact pressure back under your foot for extra stability. For in/out, most riders will center their cleat between the lugs. That’s sound, but if you are large framed you might prefer a wider pedal stance, so move your cleats toward the inside in order to move your feet outward. You may feel more stable and balanced over the bike. Vice versa also applies. If you are slender you may want your feet closer together, so move the cleats to the outside, which moves your feet in. Rotational Alignment is the most subtle adjustment. If you are riding Crank Bros then there is so much float it’s rarely an issue, but SPD’s can be sticky and self-centering. If the cleat rotation is not ideal you could transfer stress up the leg into the knee. When riding you should have enough play to move your heels both inward and outward (to the point of release) equally. i.e. when the cleats are centered in the pedals, the shoe angle should match your natural cycling foot angle, with no crank-arm interference. Check that the sole lugs are not impeding pedal entry and exit. You might have to shave off a bit of lug rubber to improve pedal engagement and release. When the cleats are set properly, clicking in feels natural and automatic, and you don’t have to hunt around to engage in the pedals.
Other possible adjustments can include canting or shimming to correct alignment issues or leg length issues.
Butt to Saddle: Always a potential sore point! Firstly your saddle should be wide enough to support your sit bones. Sit on your saddle and prod a finger up into your glutes to find your sit bones. They should be just inside the edges of the saddle, not on the edge or hanging off so that you are supported by perineal soft tissue. After width is profile. Your butt should automatically snuggle into a “home” position on the saddle that feels supportive, and not be squirming around trying to find the sweet spot. If you are squirming around, you may have the wrong saddle shape. If you have a flat saddle, try a semi-round. Saddle tilt will also affect comfort on the saddle, and to the bars. The general guideline is for a saddle to be level from nose to tail.
On a hardtail a level saddle becomes nose down due to front suspension sag, so you might want to angle it up a degree or two. On a full suspension bike a level saddle often becomes nose up if the rear suspension sags more than the front. XC riders may want to then tilt their saddle down a touch, as there may be too much soft tissue pressure when climbing, but riders focused on the down usually prefer a nose up saddle to reduce the propensity to slide forward when descending.
Hands to Bars: I’m referring to direct contact here. i.e. the grips. Getting numb fingers or hands? That’s from compression of blood vessels and nerves in the hands. If you are newish to mountain biking you may be too tense and “gripped”. Think about relaxing your hold on the bars a little bit, while still maintaining bar control. Consider ergonomic grips instead of standard round grips. They help spread out your hand pressure over a larger surface area and stabilize your wrists. It may take several attempts to get them rotated to an ideal position, so be prepared to stop and adjust them on your first trail ride. Hand discomfort can also be from bars that are too wide, bars too high and close to you, or bars too far out or down, and this will be usually indicated by the addition of arm, neck, shoulder or back tension and fatigue.
Saddle Position: Setting saddle height can be a compromise between optimizing uphill climbing power, and bike control and handling in technical terrain and when descending. If you have a dropper post, you can have it all. Set the saddle height for climbing, because you can easily drop the saddle to lower your body mass, increase control and reduce the chance of being catapulted off the bike. Without the benefit of a goniometer or 3D motion capture system to assess leg angles, a DIY guideline is to be able to have your heel touch the center of the pedal with your leg straight and knee locked out, without having your pelvis either drop down (saddle to high) or tilt up (saddle too low) from that position. This should result in a modest knee bend when clipped in. Riding on flat pedals? This method may leave you a bit too high, because with a mid foot pedal position you are operating a shorter lever from pedal to saddle.
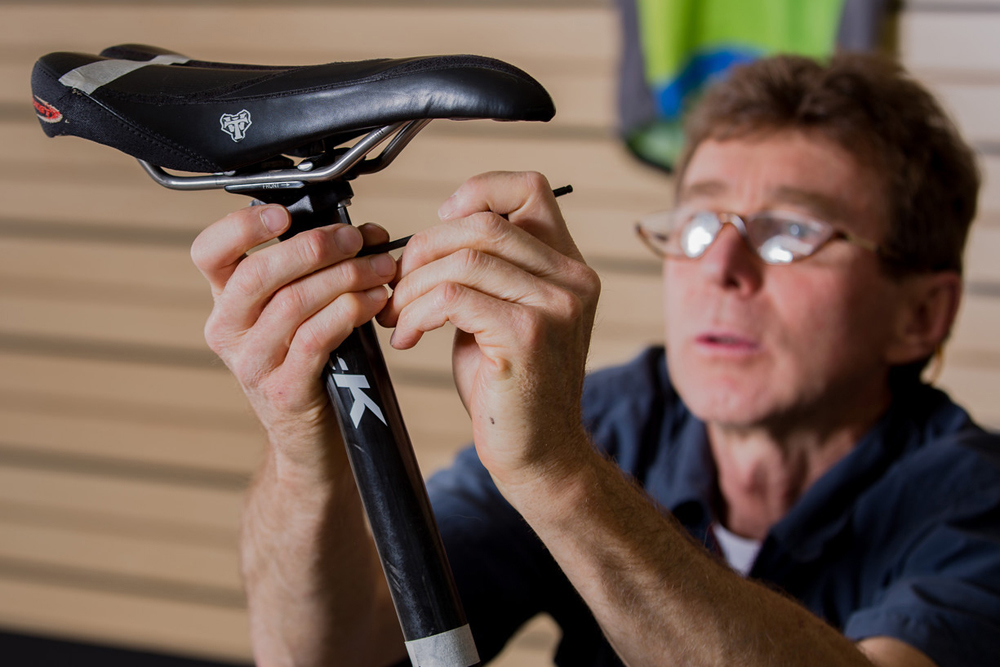
No dropper post? If you are a non-competitive rider, the $20 alternative is the quick release seat post, which will enable you to enjoy good leg extension for ups, flats and rolling terrain, but lower your saddle for greater control and safety on technical descents. You are probably not sitting on the saddle during these sections, but this quickly gets it out of the way, with a bonus rest stop. Once your ideal climbing saddle height has been determined, mark the post at the top of the clamp for reference. Lightly score an alloy post, or use a colored nail varnish or grey sharpie marker on a carbon post.
Saddle forward/back should never be adjusted because of an issue with reach to the handlebars, although it directly affects that. This adjustment is about finessing your knee joint angles for wellbeing, being balanced on the bike (while seated), and attaining biomechanical efficiency for pedaling. The simplest DIY approach (which requires a second person) is the well known “knee over pedal spindle” method. It’s not an end in itself but is an indicator about these other factors, and a good starting point.
Bar Position: This is really about upper body comfort. Firstly, bar width. Just because they come wide, doesn’t mean you need to keep the width. If you experience shoulder or arm tension and feel “stuck” on the bike, try moving the controls and grips inboard a little bit and seeing how that feels and rides. Test ride different simulated widths before cutting the bars shorter. Bar height and reach can be adjusted by changing stems and the headset spacers. There is not a simple diagnostic DIY guide for this, but neck, shoulder and upper or lower back tension and aches often originate with a handlebar position that is not ideal for you. More commonly this is from a front end that is too low and long, but it can also result from the opposite. You don’t want to be supporting your upper body with your hands (that’s what the core is for), nor stiff-arming off the bars and holding your upper body too erect for comfort. The aim is a light tough on the bars with versatility to move around over the bike and keep your weight centered when riding on or off the saddle.
John Higgins operates the BikeFitr fitting studio, and Fit Kit Systems which provides education and equipment to bicycle retailer and fitters. Contact: [email protected]